Back to TheWorxHub for Senior Living Main Menu
Adding a Trip
Watch the Video Tutorial:

- Click on the Add button in the upper right corner of the page and select Trip.
General Info
- Type the names of the Passengers that will be attending the trip. You can add as many passengers as needed.
- If the person attending the trip is not listed as a Resident, click Add ad hoc passenger to add them to the trip.
- Enter the Trip Date.
- Click the Check driver availability link to check the driver schedule.
- Choose either the Appointment Time or Departure Time setting.
- If you select the Appointment Time option, TheWorxHub will automatically calculate the Start and End times of the trip based on the drop off location, the appointment time, and whatever lead time you have set up in your account settings.
- If you select the Departure Time option, enter the Start and End times for the trip.
![]()
Where & When
- The starting location will automatically populate in the From field based on your account's settings. If the starting location is different for this trip, delete the text and enter the appropriate starting location.
- Enter the destination address in the To field. If the destination is saved as a favorite, it will automatically appear in the list. You can also click the favorites link to see the list of favorite destinations in the account.
- If you selected the Appointment Time option, enter the time in the Appt. Time field.
- Select whether the Driver Should wait or drop off depending on the drive time. *Note: If the driver will be dropping off passengers, you have the option to schedule a pick up.
- If the driver will be waiting, enter the Est. Wait time in minutes.
- If the trip requires more than one destination, click the Add Another Stop link and enter the destination details. *Note: You can click and drag the pin icon (
 ) to rearrange the destinations in a particular order.
 - Uncheck the Return to Start box if this is a one way trip.
Trip Name & Other Details
- Enter Trip Name.
- Type the name of the Requestor of this trip.
- If applicable, type any Special Notes for the trip.
- Select a Trip Category from the pick list.
- Check the Sharable box if this is a trip that other passengers can join.
- Click Save. Once you click Save, additional sections of the trip form will appear.
Driver
- Click on Add Driver.
- In the Assign Driver window, the trip will be highlighted and assigned to No Driver.
- Click on the same time slot that is highlighted next to the driver you would like to assign to this trip. The trip will now appear on that driver's schedule.
- To remove the driver from the trip, click Undo.
- Click Save.
Vehicle
- Select a vehicle for the trip by clicking the assign link next to the vehicle you wish to use for this trip.
- By default, only available vehicles will show. If you would like to see all vehicles, check the Show unavailable vehicles box.
- If you need to switch the vehicle for another, click the Change link.
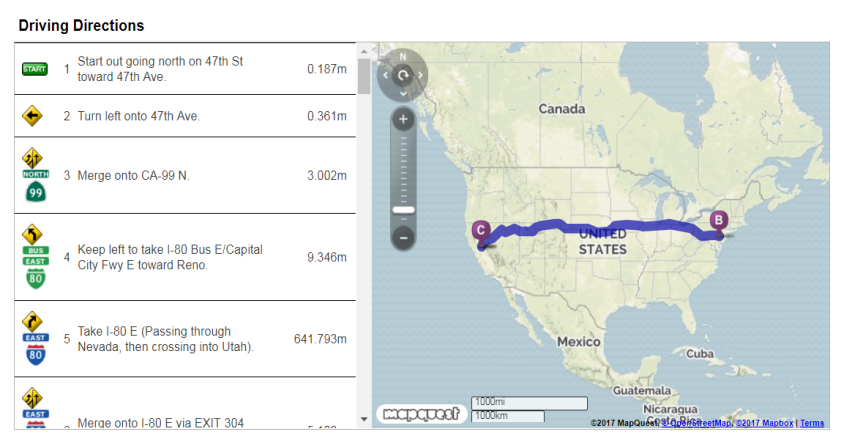
Map and Directions
This section of the Trip form shows turn by turn directions as well as a map of the trip route.
- Click on Map & Directions to expand this panel.
Billing
- Click on Billing to expand this panel.
- Check the Mark as Billable box to create a bill for this trip.
- The Bill Date will automatically populate with today's date, but you can change the date if necessary.
- If applicable, select a Billing Code from the pick list.
- The Charges for each household will automatically be calculated based on the billing settings in your account. To learn more about setting up billing for transportation, see the Trip Billing Settings page.
- To add additional charges, click on the Add Another link.
- In the pop-up window, check the box next to the Billable Items you need to add to this bill. To learn how to create custom billable items, see the Trip Billing Settings page.
- Click the Add button.
- To apply the charge to all passenger households on the trip, click the Apply to all link.
- If you need to change any of the information, make the necessary edits and click the Save button.
![]()
Log
The Log is where any changes made to the trip will be recorded.
- Click Log to expand this panel.
- You can record a note in the Log by clicking the New Note button.
- Enter the note in the text box and click Save.
![]()
